Database Creation!
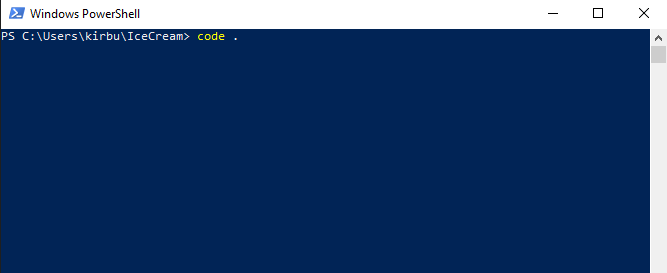
STEP 1: Open PowerShell and find the base project directory
Run the command "code ." omitting the quotes, to open Microsoft Visual Studio.

STEP 2: MVC Prep {Model-View-Controller}
MVC is a commonly used software architectural pattern in web applications. An application with MVC architecture has the logic of the app separated into 3 sections; Model, View, and Controllers.
How do we apply this to the Ice Cream project?
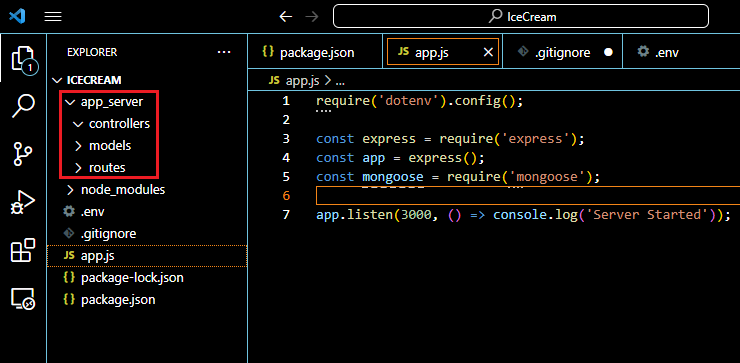
It's simple! Create a folder in the root directory and give it the name "app_server"
Inside the app_server folder, you're going to want to create 3 folders.

STEP 3: Database Prep
If we want to manage a database that holds an IceCream Store's information, we'll need to create a location for the MongoDB database to exist at.
Let's open the .env file and copy the following line of code.
DATABASE_URL='mongodb://localhost/IceCream'
This basically creates a variable named, "DATABASE_URL" that can be imported and referred to anywhere in the application. It is generally good practice to avoid hard-coding addresses into applications. To import this variable we just need the first line of app.js
require('dotenv').config();
STEP 4: Connecting to the database!
We are just four lines of code off from being connected to a MongoDB database!
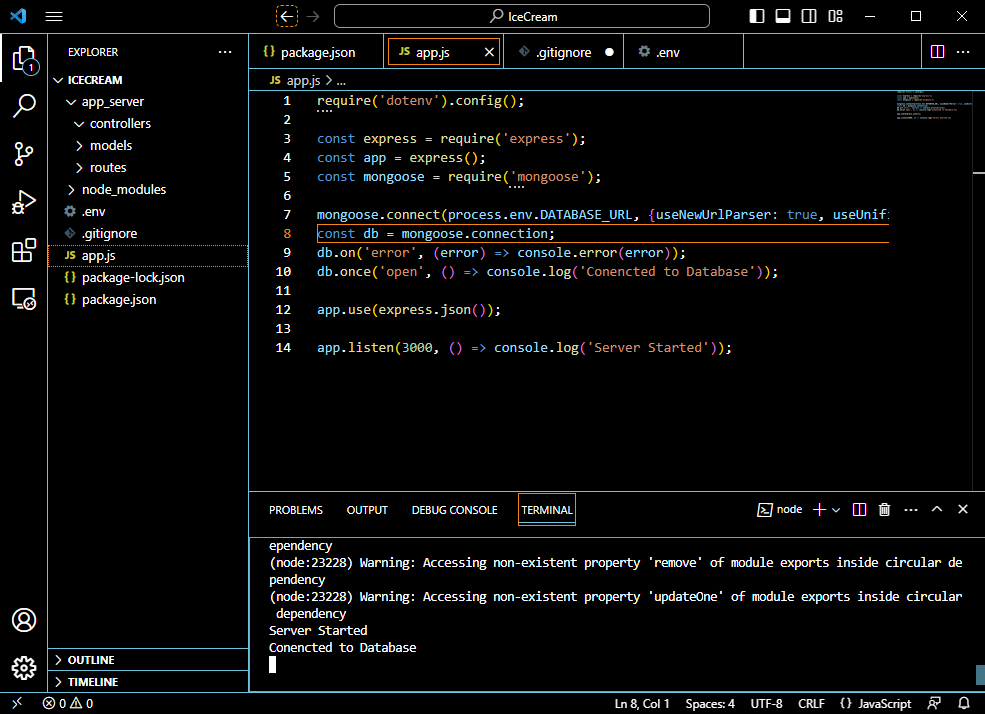
mongoose.connect(process.env.DATABASE_URL, {useNewUrlParser: true, useUnifiedTopology: true});
const db = mongoose.connection;
db.on('error', (error) => console.error(error));
db.once('open', () => console.log('Conencted to Database'));

app.use(express.json());
In the first method, mongoose.connect, passes through the environment's variable that is storing the IceCream Database's URL. It then passes the two options that enables the new MongoDB connection string parser. The other option enables the new unified topology engine for the MongoDB driver.
The db object is then created from mongoose.connection, which will allow us to point listeners to give feedback in the console log.

Once your code is looking like mine, it should run and give the beautiful log entry that you have connected to the database! In the next guide, I'll show how to start creating a model for the flavor table as well as how you can easily create json files to work with for free.